Chicken and Sweet Potato Tortilla Pie with Real California Mexican Cheese Blend

In need of a Fall casserole? Look no further than this cheesy tortilla pie, with the tastiest mixture of sweet and spicy, all in one!

Tortilla pies, also known as Pastel Azteca, Budìn Azteca, and Mexican Lasagna – are made by alternating layers of corn tortillas with a protein, like chicken or pork, salsa, vegetables, and most importantly – cheese!

Since I’m using corn tortilla instead of pasta to make this lasagna, this dish isn’t as heavy. And with the cheese in this recipe, I get a great source of protein, calcium and vitamin D, all of which are essential nutrients the body needs at every stage of life. Because Real California Mexican cheeses make for some of my favorite cheeses, it was difficult for me to choose which one I wanted on this hearty casserole – so I chose a blend! The Monterey Jack, queso blanco, asadero, and cheddar cheese melted beautifully by the time everything was said and done.

Did you know that California is the leading producer of Hispanic-style cheese and dairy products? When you look for the Real California Milk seal, you’ll know the products are made with milk from California dairy families, who responsibly produce nutritious dairy foods.

For more nutrition information and healthy recipe ideas, visit http://www.realcaliforniamilk.com/

Chicken and Sweet Potato Tortilla Pie with Real California Mexican Cheese Blend

Time: 2 Hours
Serves 6

Ingredients
2 pounds boneless, skinless chicken thighs
Kosher salt and freshly ground black pepper
1 28-ounce can diced tomatoes
3 canned chipotle peppers in adobo, roughly chopped
2 tbsp adobo sauce from canned chipotle peppers
6 birdseye chilies, roughly chopped
1 tablespoon Worcestershire Sauce
2 tsp dried Mexican oregano
1/2 lb sweet potato, peeled, chopped into 1 ½ -inch pieces
1 large white onion, roughly chopped
6 garlic cloves, peeled and roughly chopped
1 lb sweet potato, peeled, sliced with a mandolin into ¼-inch thick slices
15 corn tortillas
3 cups shredded Real California Mexican Cheese Blend
1 jalapeno, sliced
2 birdseye chilies, sliced

Directions
Season chicken on both sides with kosher salt and freshly ground black pepper.

In a medium bowl, combine tomatoes, chipotle peppers, adobo sauce, birdseye chilies, Worcestershire sauce, Mexican oregano, and 1 tsp salt.

Add ½ lb chopped sweet potato, onion, and garlic to the bottom of a large pressure cooker. Place chicken on top of the vegetables and pour over the tomato mixture. Seal pressure cooker and bring to high pressure over high heat. Reduce heat to low and cook for 15 minutes.

Release the pressure and transfer the chicken to a platter to cool. Add the vegetable mixture to a blender and puree into smooth sauce. Season to taste with salt and pepper if desired.

Heat a large pot of salted water to a boil. Add the sliced sweet potatoes and cook for 5 minutes, until al dente. Drain sweet potatoes and cool.

Preheat oven to 350 degrees F.

Spread 1 cup of the tomato sauce over the bottom of a 13x9-inch baking dish. Cover the sauce with 5 tortillas, followed by half of the chicken and half of the sweet potatoes. Pour two cups of tomato sauce over the casserole, and top with 1 cup of cheese. Cover with 5 additional tortillas, the remaining chicken and sweet potatoes. Pour over two cups of the tomato sauce and cover with 1 cup of cheese. Finish the casserole by covering with the 5 remaining tortillas, two cups of sauce, and 1 cup of cheese. Top with sliced jalapeno and birdseye chili slices.

Transfer the casserole to the oven and bake for 1 hour, or until the cheese has browned and the casserole is cooked through. Allow to cool slightly before serving.


Comment


Print

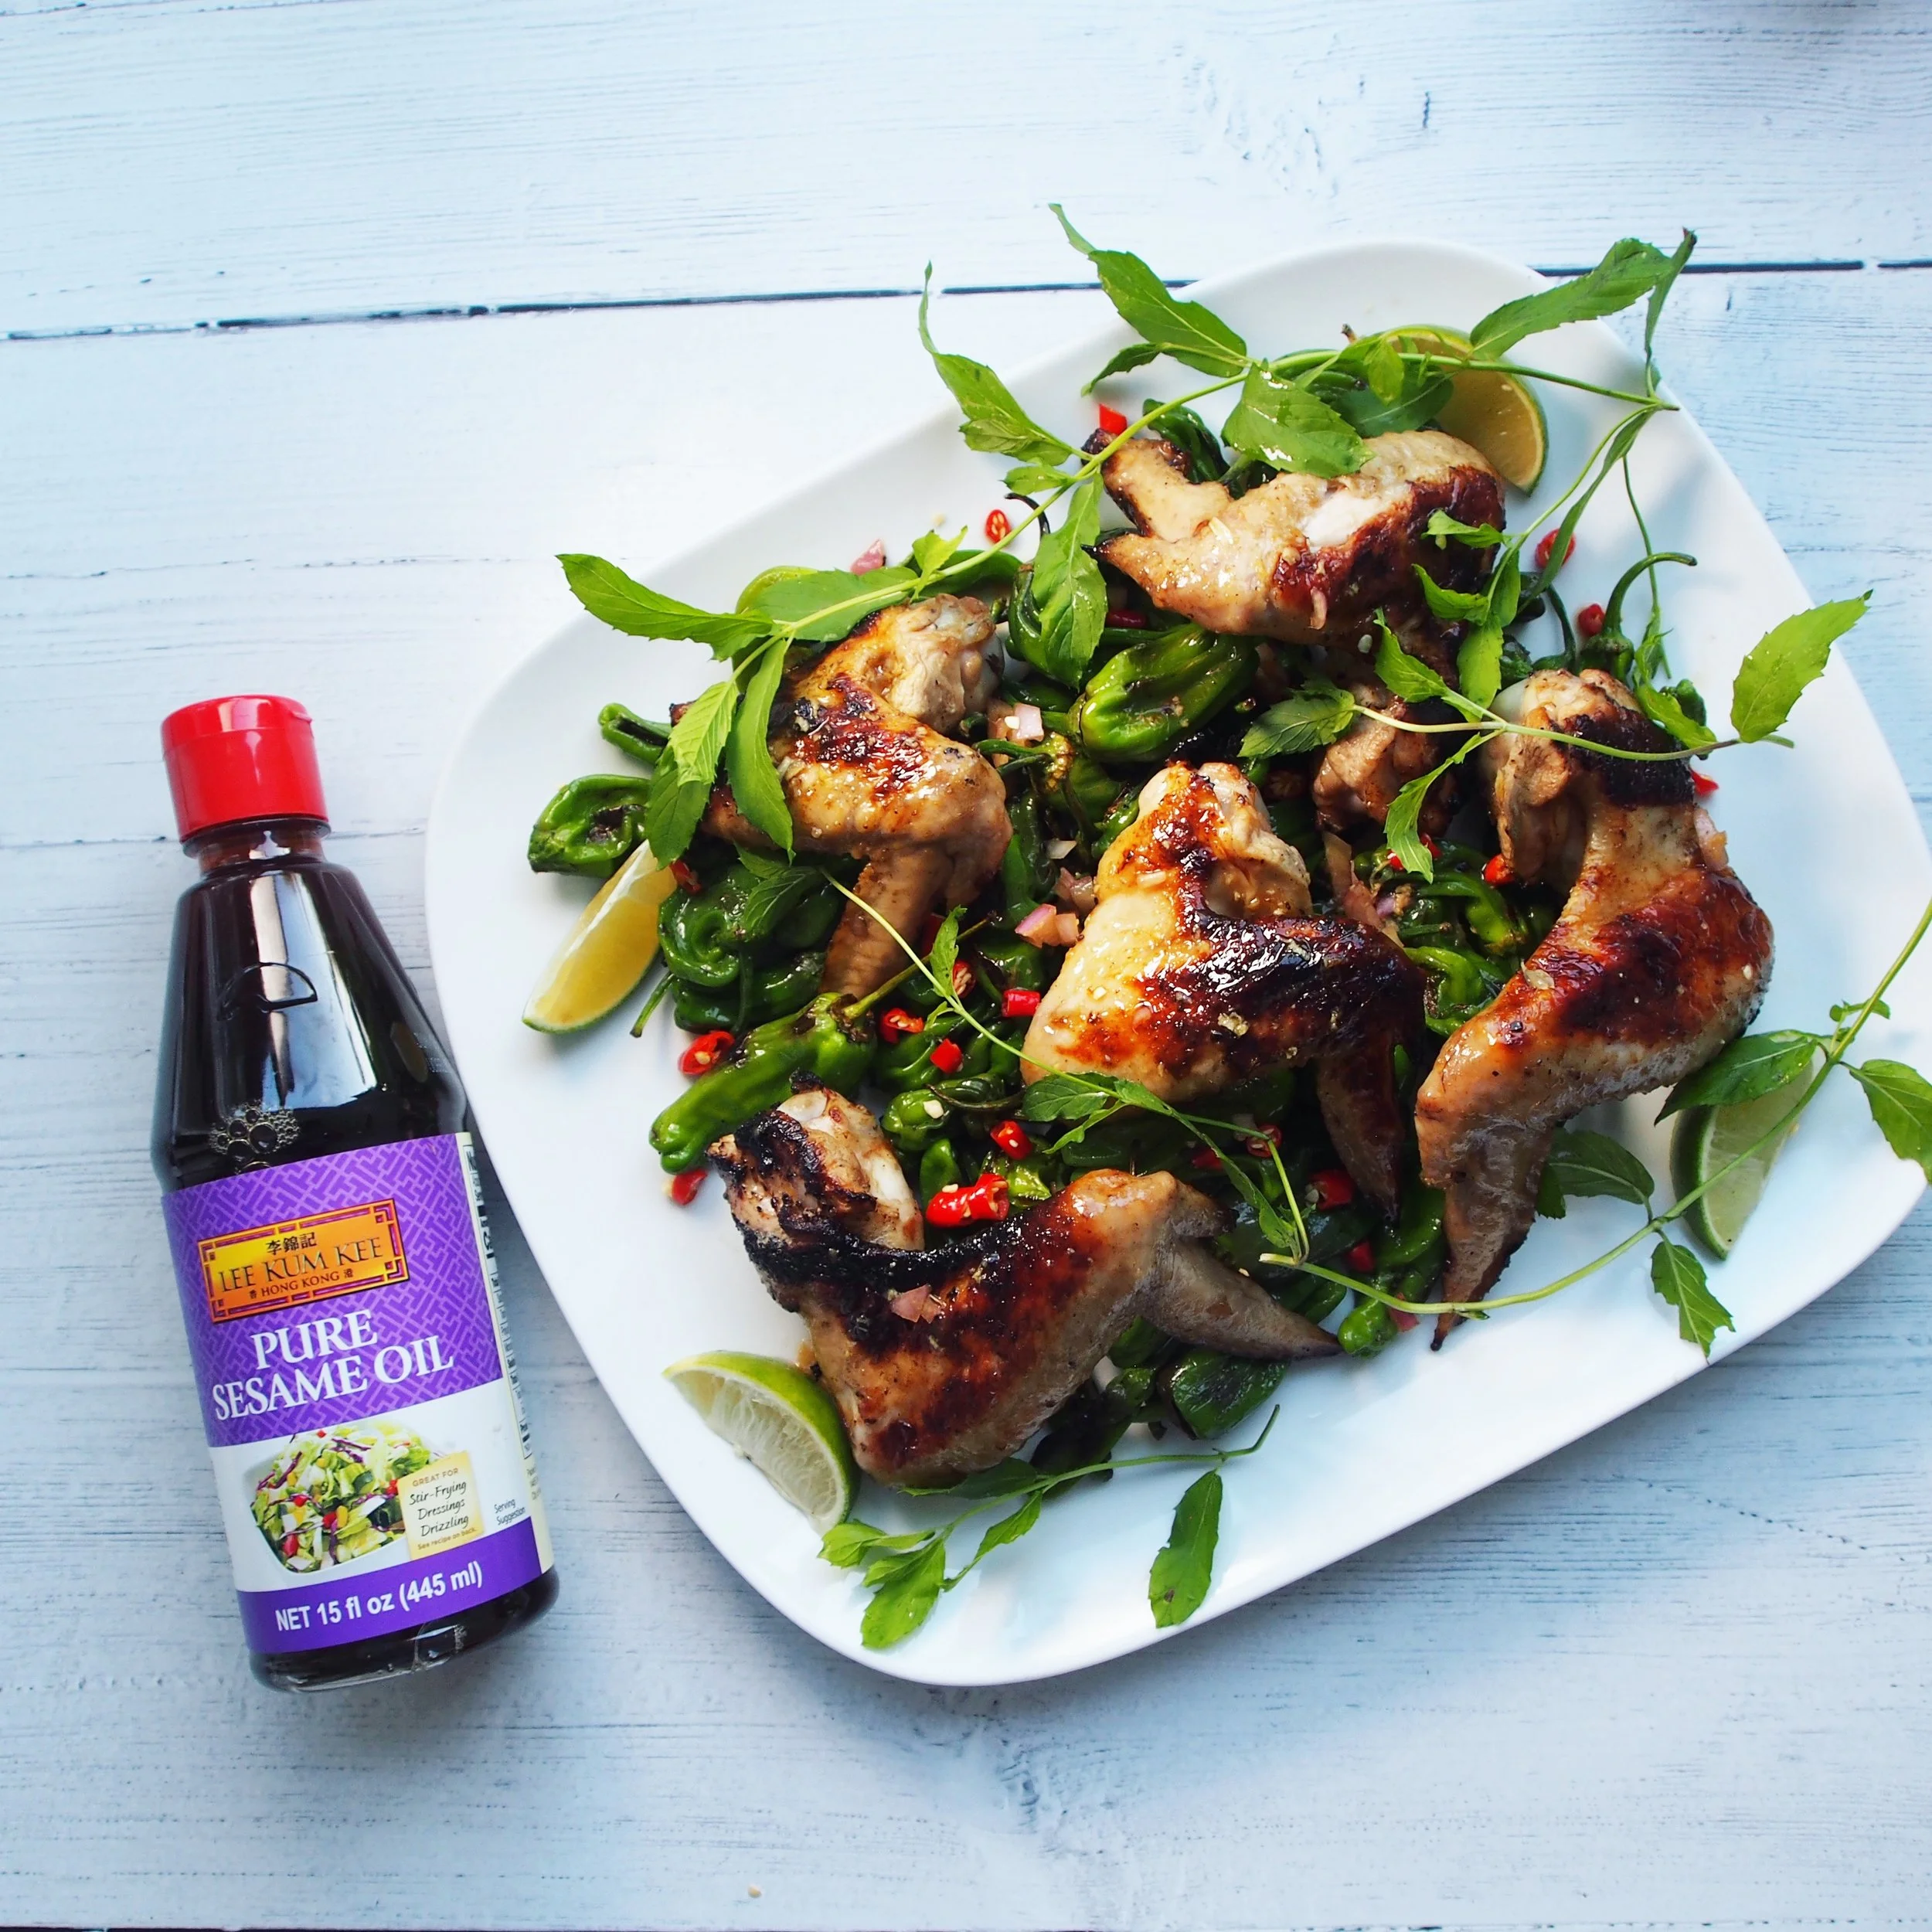
Grilled Chicken with Shishito Peppers

IMG_2108.JPG

Summer has certainly flown by, but that doesn’t mean that the temperature has cooled off one bit! In fact, it was so hot in my kitchen this weekend that Adrian and I decided to take the cooking outdoors – to our garden-side grill.

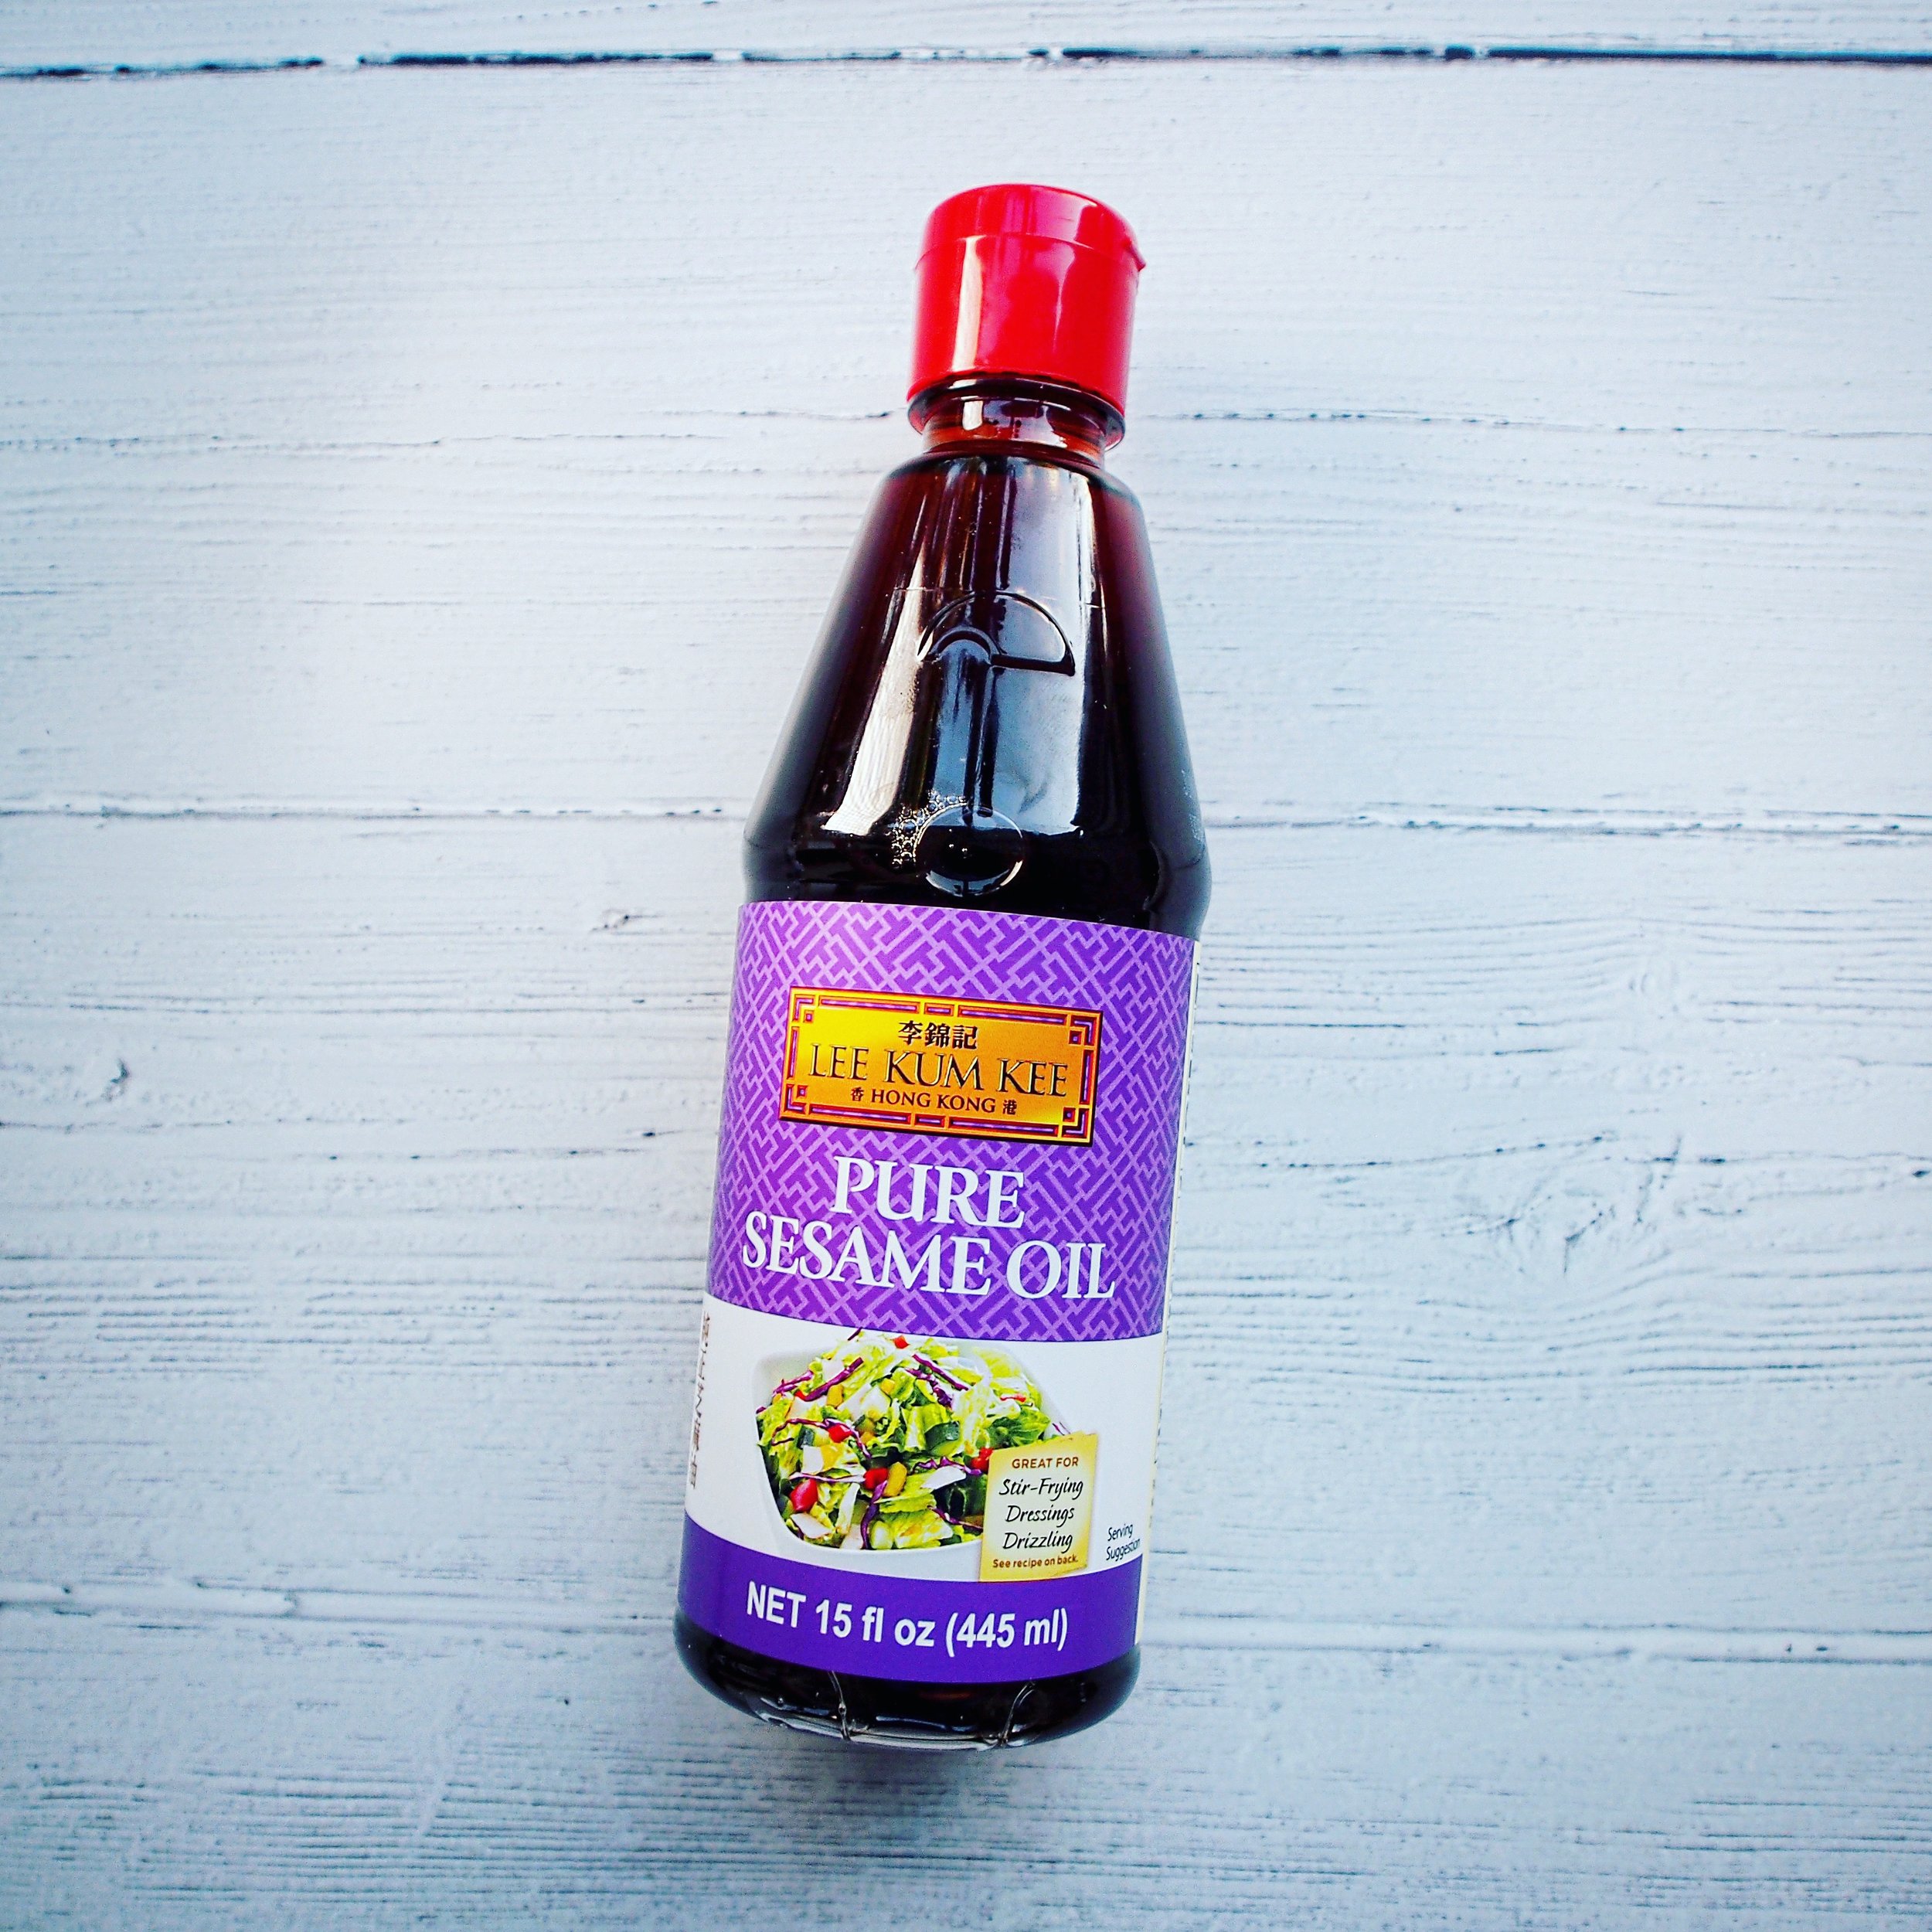
When it’s hot out, I enjoy making simple meals, and sesame grilled chicken with shishito peppers is just that! Luckily Lee Kum Kee’s wide-ranging products are always in my pantry when I want to make a delicious and quick meal with Asian flavors.

As a leading maker of Asian sauces and condiments for over a century, Lee Kum Kee is the perfect brand to reach for at your local grocery store when you want to put your own twist on your favorite recipes. You can find out more about their products here, which can be purchased at your local grocery store in the Asian food aisle.

IMG_2110.JPG

So, what makes this dish so delicious? The chicken is marinated in Lee Kum Kee Pure Sesame Oil, a versatile cooking staple (!) with soy sauce, shallots, garlic, ginger, lime juice, and honey. The flavors from the sesame oil really stand out because it’s carefully processed by Lee Kum Kee to retain a strong sesame flavor and aroma.

The shishistos are quickly tossed with the sesame oil, salt, and pepper. It’s all thrown over a hot grill, and when finished, is garnished with lime wedges, mint, and chilies!

IMG_2109.JPG

Quick and easy with authentic Asian flavors? Yep, that’s this dish! And it’s one you’re going to want to cook up before summer ends!

Grilled Chicken with Shishito Peppers

Time: 30 Minutes
Serves: 4-6

Ingredients
¼ cup peanut oil
6 tbsp Lee Kum Kee Pure Sesame Oil, divided
¼ cup light soy sauce
¼ cup shallots, finely chopped
1 large garlic clove, minced
2 tablespoons ginger, minced
½ cup fresh lime juice
Kosher salt and freshly ground pepper
1 tbsp honey
2 ½ pounds chicken wings
½ lb shishito peppers

To Garnish
Lime wedges
Mint leaves
Sliced birdseye chilies

Directions
In a medium mixing bowl, whisk together the peanut oil, ¼ cup sesame oil, soy sauce, shallots, garlic, ginger, lime juice, and season with kosher salt and pepper. Set aside ¼ cup of the marinade. Pour remaining marinade over the wings. Optional: Allow wings to marinate in the refrigerator for one hour or overnight.

Preheat a grill over medium heat. Oil the grill grates with peanut oil. Cook the wings, turning occasionally, for 10-15 minutes, until the skin is crisp and the wings are cooked through to an internal temperature of 165 degrees. Remove wings from heat and keep warm.

Combine shishito peppers with 1 tbsp sesame oil in a medium mixing bowl. Season to taste with salt and freshly ground black pepper. Transfer peppers to a grill pan over the hot part of the grill, and turn often, until blistered and charred in spots, about 2-3 minutes. Remove from heat.

Serve wings with shishito peppers on a plate and drizzle over reserved marinade. Serve with lime wedges and garnish with mint and bird’s eye chilies.


Comment


Print

Sopes with Potato-Chorizo Hash and Real California Queso Fresco

If you haven’t heard of sopes yet, get ready to make some! These sopes come with a scrumptious potato and chorizo hash and are topped with Real California queso fresco. Did anyone say yum yet?!

Similar to tacos, sopes are made with masa, but are pressed into a different shape that offers a different mouthfeel. They can be topped with any of the ingredients you love in tacos. They can be fried like the recipe below, or for lighter fare, they can be cooked on a griddle.

I paired these sopes with a Peruvian sauce called aji verde. It’s spicy from the jalapeños, but creamy from the Real California queso and really serves this recipe well.

Don’t forget to look for the Real California Milk seal when purchasing your cheese for this recipe or any other dairy recipe. Real California Milk produces sustainable dairy foods that offer nutritional benefits that are unique from plant-based foods. What more can you ask for?

Sopes with Potato-Chorizo Hash and Real California Queso Fresco

[Sponsored]

Time: 1 Hour
Serves 6-8
Makes 16 Sopes

Ingredients

Aji Verde Sauce
Canola oil
1 small onion, roughly chopped
4-6 medium jalapeno peppers, seeded
1 large garlic clove, peeled
1/2 cup cilantro, leaves and stems, packed
1/2 tsp salt
¾ cup Real California queso fresco

Masa Dough
3 cups instant yellow corn masa flour
1 tsp salt
1 tsp baking powder
¼ cup lard, melted
2 ¼ cups water
Canola oil

Potato Chorizo Hash
1 lb Yukon gold potatoes, peeled and cut into ½-inch cubes
2 lb fresh Mexican chorizo
Kosher salt
2 small white onions, finely chopped
18 medium epazote leaves, roughly chopped (optional)

To Garnish
Real California queso fresco
Chopped cilantro leaves, for serving
Lime wedges

Directions
In a medium skillet, heat 2 tbsp canola over medium heat. Sauté the onion, peppers, and garlic until soft, about 4 minutes. Add the pepper mixture to a blender with 2 tbsp olive oil, cilantro, salt, and queso fresco. Blend until creamy, about 1 minute. Season with salt if desired and transfer to the refrigerator to cool.

Combine the masa, salt, and baking powder in a large mixing bowl and stir to combine. Stir in lard and water. Mix thoroughly for 2 minutes to form a smooth dough. Form dough into 16 individual 2-inch balls and set aside on a parchment-lined baking sheet.

Press each masa ball into the palms of your hands to form a ¼-inch thick round. Crimp the edges of each round to form a crust.

Preheat oven to 200 degrees F.

Heat ¾-inches of oil in a Dutch oven over medium-high heat to 400 degrees F. Working in batches, fry 3 sope boats on one side for 2 minutes. Turn sopes over and cook for 2 more minutes until golden brown. Transfer to a baking sheet and move to the oven to keep warm. Repeat with remaining sope boats.

Add the potatoes to a bowl with ¼ cup water. Cover the bowl with plastic wrap and pierce with a fork a few times. Microwave for 4-5 minutes until the potatoes break easily with a fork. Drain off water.

In a medium skillet, cook chorizo over medium-high heat and break up with a spoon until the chorizo starts to brown, about 1 minute. Continue breaking up the chorizo with a spoon and add the onion. Sauté with chorizo for 10 minutes, until the onion is soft. Add the potatoes and lower the heat to medium. With the back of a cooking spoon, mash the potatoes into the chorizo and allow to brown for a minute. Scoop up the mixture and mash again, continuing this process about 10 minutes, until the potatoes are crispy. Season with salt to taste.

Assemble 2-3 sope boats per plate and top with chorizo filling and aji verde. Garnish with queso fresco and cilantro. Serve with lime wedges.


If you loved this recipe, you will love my recipes for Chicken Mole Verde Tacos, Mushroom Tacos with Fried Eggs, and  Mushroom & Pesto Quesadillas!

Comment


Print

Best Ever Portobello Breakfast Sandwich

[Sponsored]

Who doesn’t love leftovers for breakfast after a night of grilling?

If you’re like me, you usually grill a surplus of vegetables so you can devour them over several meals. After all, you put in all that work! Why not cook a few more AND pair them with Hunts Best Ever Ketchup?

Hunt’s tomatoes are California-grown and make for such a delicious and thick ketchup that you’ll never want to be without it on grill night!

Sometimes when we have large get togethers, my friends and I don’t get to cooking all of the fresh vegetables, so it’s up to me to prepare them the next day. One of the best vessels for serving them up is in a breakfast sandwich.

Since I don’t usually feel like firing up the grill again, I do all of the cooking in the kitchen. So, the recipe below is a breakfast sandwich you can make sans grill. Or, you can grill the mushrooms and shishito peppers the night before and put this sandwich together in a jiffy! Whatever strikes your fancy!

Best Ever Portobello Breakfast Sandwich

Ingredients
Extra virgin olive oil
½ cup balsamic vinegar
10 cloves garlic, minced, divided
Kosher salt and freshly ground black pepper
4 large Portobello mushrooms, cleaned and stemmed
4 slices Gruyere or Swiss cheese
1/2 lb baby arugula
16 small shishito peppers
4 large eggs
4 brioche hamburger buns
Hunt’s Best Ever Ketchup 

Directions
Preheat the broiler and add mushrooms to a baking sheet.

In a medium bowl, combine the olive oil, balsamic vinegar, and 6 cloves garlic. Season with salt and pepper. Pour the marinade over the mushrooms and set aside.

Transfer the mushrooms to the broiler and broil for 5 minutes on each side. In the last minute of broiling, add cheese slices to the mushrooms and allow the cheese to melt. Keep warm.

In a medium skillet, heat olive oil over medium heat. Add 2 cloves garlic and cook until fragrant, about 30 seconds. Stir in arugula and season with salt and pepper. Sautee until wilted, about 2 minutes. Transfer to a plate.

To the same pan, heat an additional tablespoon of olive oil over medium heat. Add garlic and cook until fragrant, about 30 seconds. Add shishito peppers and season with salt and pepper.  Stir occasionally, until partially blackened. Remove from heat.

Break four eggs into small ramekins. Heat 2 tbsp olive oil over medium-high heat in a small cast iron skillet. Pour one egg at a time to the skillet. Using a spoon, baste egg with olive oil from the pan and cook for about 1 minute, until the edges are crisp, and the yolk just begins to thicken. Transfer to a paper towel-lined plate and repeat with remaining eggs. Season eggs with salt and pepper.

Toast brioche buns if desired.

Prepare the sandwich: Spread copious amounts of ketchup to both sides of the bun. Top the bottom half of the bun with arugula followed by the Portobello mushroom, shishito peppers, and egg. Finish with remaining bun half and enjoy!


If you liked this recipe, you will also love my recipes for The Best Barbecue Chicken Sandwich Ever, Beet Rueben Sandwich, and Crispy Pork Cutlet and Fried Egg Sandwich

Comment


Print

Chicken Enchiladas with Real California Monterey Jack Cheese and Sour Cream

Did you know that enchiladas are a great way to clean out your fridge? Whether you have leftover chicken, dairy, veggies, or all of the above (!), enchiladas can be a fabulous way to reduce waste in the kitchen. On a typical week, I tend to have tortillas, peppers, and onions hanging around in my fridge, so all I have to do is pick up a couple ingredients, including Real California Milk dairy products, to get these enchiladas going! Sometimes I even have rotisserie chicken leftover which makes these enchiladas super yummy!

We all know #CADairy products can be relied on as a healthy and tasty way to consume essential vitamins and minerals, but did you also know that sustainably feeding a global population that is expected to grow to ten billion by 2050 will require collaboration, as well as an innovative and efficient food system? California’s dairy farm families are well-positioned to play a major role and are committed to continuous progress by maximizing resources and minimizing pollution. So, when purchasing dairy, I encourage you to look for nutritious Real California Milk products that nourish people.


Chicken Enchiladas with Real California Monterey Jack Cheese and Sour Cream

Time: 1 Hour
Serves 4


Ingredients
2 ½ pounds skinless chicken legs, thighs, and breasts
1 bay leaf
6 peppercorns
5 medium cloves garlic, unpeeled
1 ½ lbs tomatillos, husks removed
1 medium onion, halved
1-2 medium serrano or jalapeno peppers, roughly chopped
Sea salt, to taste
Freshly ground black pepper, to taste
1 tbsp olive oil plus additional for frying
12 corn tortillas
½ cup Real California Monterey Jack cheese, shredded
1/3 cup Real California Milk light sour cream or Mexican crema
1 small white onion, finely chopped
½ bunch cilantro, stems removed, chopped
4 birdseye chilies, chopped, for garnish (optional)

Directions
In a large stockpot, add chicken, bay leaf, peppercorns, 2 cloves garlic, and ½ onion. Add cold water several inches above chicken level and bring to a boil. Simmer on low heat for 20-25 minutes, or until internal temperature reaches 150F (the temperature will rise when the chicken rests). Reserve ½ cup chicken broth and transfer chicken to a platter, breaking up the chicken a little with two forks to speed cooling.

Meanwhile, add tomatillos to a large saucepan with 3 cloves garlic and ½ onion. Add cold water slightly above tomatillo level. Bring to a boil and reduce to a simmer for 10 minutes, or until tomatillos are soft. Strain tomatillos and garlic and set aside to cool.

Once tomatillos and garlic have cooled a little, add to a blender with reserved chicken broth and peppers. Blend on high until smooth. Season to taste with salt and pepper. Add 1 tbsp olive oil and blend again for 10 seconds to combine.

In a shallow skillet over medium-high heat, add enough olive oil to coat the bottom of the pan. Lightly fry tortillas for about 30 seconds on each side and transfer to a paper towel lined plate, adding new paper towels between each tortilla.

To plate, fold tortillas in half and slightly overlap them in an even layer (3 tortillas per person). Spoon over a layer of tomatillo sauce followed by a layer of shredded cheese, chicken, Mexican crema, diced onion, and cilantro. Top with additional tomatillo sauce, and garnish with birdseye chilies if desired.


Comment


Print

Zucchini Fries with Hunt’s Best Ever Ketchup

Summer is officially upon us! That means there will not only be a lot of grilling and barbecuing but also a LOT of zucchini growing in our gardens.

I can think of no better way to use up summer’s gift of fresh zucchini than making fries to serve up with your summer barbecue and dipping them in Hunt’s Best Ever Ketchup. So much yum! The zucchini is super sweet and pairs so well with the ketchup’s flavors.

Hunt’s Best Ever ketchup is grown with vine-ripened tomatoes from California and is made without high fructose corn syrup. It’s thick, and rich, and perfect for all of your summer cookouts!

Zucchini Fries with Hunt’s Best Ever Ketchup

Time: 30 Minutes
Serves 2-4

Ingredients
Light olive oil, for deep-frying
2 large eggs
Kosher salt and freshly ground black pepper, to taste
¾ cups flour
1 cup panko breadcrumbs
1 cup parmesan, grated
2 large zucchini, halved, cut into 4-inch by 1/3-inch strips
Hunt’s Best Ever Ketchup, for serving
Thyme leaves, for garnish
1 lemon, cut into wedges

Directions
In a large skillet or Dutch oven, add olive oil to reach a depth of 1 inch. Heat the olive oil over medium heat until the temperature reaches about 350 F.

Beat two large eggs in a medium bowl and add salt and pepper to taste. Add flour to a medium plate. Combine panko, parmesan, salt, and pepper on another large plate.

Coat zucchini in the flour, then dip into the eggs, shaking off any excess. Dip the strips into the panko. Add coated strips to a large baking sheet lined with parchment paper.

Add zucchini to the oil in batches, and fry until golden brown, about 2-3 minutes. Add to a paper towel-lined plate to drain. Serve the fries on a large plate with Hunt’s Best Ever Ketchup and lemon wedges. Garnish zucchini with thyme and additional parmesan if desired.


Comment


Print

Playa del Carmen, Cozumel, and a Cenote!

Mexico Part 3: My throwback to my Mexico trip wouldn’t be complete without another picture of Octopus!

This pulpo carpaccio from indigo beach club is a delicious lunch at Indigo Beach Club's restaurant in Playa del Carmen

This carpaccio de pulpo from Indigo Beach Club  in Playa del Carmen looks out of this world doesn’t it? Especially with the pineapple pieces and a little spicy kick from the sauce. So much yum! Lunch with a beach view is probably one of my favorite pastimes.

A view from the beach at Playa del Carmen in Mexico near the Indigo Beach Club.
Playa del Carmen’s beach. Lovely sunset views with seagulls flying over the Caribbean sea.

What’s fun about the beach in Playa del Carmen is it takes you on adventures. After our visit to the beach club, we took ourselves on a leisurely stroll along the sand until we ended up, sort of by accident, at the ferry terminal to Cozumel. Visiting the island hadn’t been in our plans for the day, but since we were at the ferry and it was leaving in 15 minutes, why not?

In Cozumel, we sipped on margaritas at a cantina along the waterfront, watched the last cruise ship take off, and researched restaurants to visit. Our choice: Kondesa. Their lovely garden setting combined with perfectly cooked seafood made for a special evening!

Cozumel's sign in the city center of Cozumel, Mexico. An island in the Caribbean near Playa del Carmen.
A view of the Caribbean sea from the island of Cozumel in Mexico.
The streets of Cozumel overlooking the cruise ships. A pretty sunset view in the island of Cozumel.
A restaurant in cozumel that serves seafood and caribbean and mexican fusion food. The restaurant has a pretty garden setting and makes for a romantic night out!

Although… that doesn’t mean we didn’t have to run back to the ferry  😂 The last ferry was scheduled to leave around 10pm and I think we made it there with one minute to spare.

A trip to the Yucatan wouldn’t be complete without visiting a cenote and that we did! My last pictures are of Cenote Azul, which are a quick taxi ride from Playa del Carmen. Cenotes are natural pools filled with fresh water and are of course, great for swimming! It was fun spending a few hours there and swimming with a few fish as well!

Cenote Azul in Playa del Carmen Mexico is one of the closest cenotes next to the city. It's a great place to swim in the Yucatan.
Cenote Azul is a great place to swim in the Yucatan. It's between Tulum and Playa del Carmen.

I bet you want to visit Mexico now! I know I definitely want to go back soon!

A view of Cancun from a plane in the Yucatan, Mexico. Cancun's strip is a sight to see, especially during sunset!

If you loved this post, you will love my other posts about my visit to the Yucatan. Check out Playa del Carmen or Bust and Tulum: Coastal Cliffs, Centuries-old Ruins, and Octopus. Oh my!

Comment


Print

Tulum: Coastal Cliffs, Centuries-old Ruins, and Octopus. Oh my!

Mexico Part 2: Tulum! Coastal cliffs, centuries-old ruins, and octopus, oh my!

Octopus at Encanto Cantina in Tulum, Yucatan, Mexico.

Tulum is one of those locales that you know is a special place once you step foot on its soil. While we didn’t have much time in town, Adrian and I were swept away.

Selfie at the tulum ruins

Not literally off the cliffs with breathtaking views of the Caribbean sea or anything.

But figuratively? We were enthralled with its natural beauty, itss rich history [the ruins are a must-see]….

…. and you guessed it, the FOOD!

Octopus tacos at encanto cantina in tulum mexico

Yep, Tulum offers coastal cuisine at its finest - like the octopus from Encanto Cantina? Oh so YUM! Or maybe you want a little turf with your 🐙? No problem. Steak gorditas have got you covered.

We’re looking forward to spending more time in Tulum on our next visit to the Yucatan. Until then, we’ll be dreaming of its warm breezes and fresh seafood!

Comment


Print

Breakfast Pizza with Real California Milk Mozzarella Cheese

What do you do when you want to eat well but you’re dying to make pizza? You make pizza with Real California Milk mozzarella cheese and butternut squash pizza crust, of course! 

But this isn’t just any pizza. It’s pizza FOR BREAKFAST. It not only has the eggs and cheese that many of us crave in the morning, but it’s one seriously nutritious breakfast that will keep you fueled and satisfied throughout the bulk of your day.

While Real California milk mozzarella cheese provides a sustainable source of essential nutrients, such as calcium and protein, I love the substitution of the butternut squash pizza crust for regular pizza crust because the added pop of color (to taste the nutrition rainbow!) and the benefit of fiber makes it a no-brainer.

Are you ready to make your next breakfast epic? Make this and I’m sure you’ll want to make it again and again

Breakfast Pizza with Real California Milk Mozzarella Cheese

Time: 35 Minutes
Serves 4

[Sponsored}

Ingredients
1 (10 oz) frozen butternut squash pizza crust
2 tbsp extra virgin olive oil, divided
¼ lb sweet Italian sausage
⅓ cup sliced red onion
1 medium fennel bulb, cored, halved, and sliced
3 garlic cloves, finely chopped
2 tsp thyme, chopped
Kosher salt and freshly ground black pepper
½ cup tomato sauce
4 oz shredded Real California Milk mozzarella cheese
2 eggs, scrambled

Directions
Preheat a baking stone in the oven to 450 F. Add pizza crust on a lined baking sheet. Bake from frozen for 10 minutes. Turn pizza over and cook for an additional 10 minutes, until golden. Remove crust from oven and set aside.

Heat 1 tbsp olive oil in a medium skillet or Dutch oven over medium-high heat. Add sausage and cook, breaking up with a spoon until browned, about 4-5 minutes. Set sausage aside in a bowl.

To the same skillet, heat 1 tbsp olive oil over medium-high heat. Add red onion and saute for 3-4 minutes until softened, scraping up any browned bits. Add fennel, garlic, thyme, and season with kosher salt and freshly ground pepper. Cook, stirring for about 5 minutes, until fennel begins to soften. Cover and cook, stirring occasionally, until the fennel is tender and golden, about 5 more minutes. Remove from heat.

On a pizza peel, top pizza crust with tomato sauce, Real California Milk mozzarella cheese, fennel mixture and sausage. Pour egg scramble over the toppings and transfer the baking stone. 

Bake pizza for 10-12 minutes, until the cheese has melted and the crust is lightly browned. Remove from heat. Allow pizza to cool slightly and serve warm.


1 Comment


Print

Rye Bread Toast with Real California Milk Fromage Blanc and Cherry Tomatoes

Need a quick snack that’s tasty and nutritious? Look no further than this rye bread toast with Real California Milk fromage blanc and cherry tomatoes!

While I grew up loving cheese toast as a child and have a battle scar on my pinky to prove it (trying to cook the dish as a 5-year old didn’t go exactly as planned when my smallest digit bumped into the broiler) -- I have to admit that this is the upgraded, adult version that is much more tasty!

Real California Milk cheeses are brimming with a sustainable quality that I absolutely love. That’s because California dairy farm families help ensure people have access to quality, sustainable and nutrient-rich foods. Plus, as a dietitian, I know recipes like this help add to the recommended servings of dairy that are essential for a healthy diet.

According to a recent study, consuming two servings of dairy per day (compared to a half serving) was associated with a reduced risk of total mortality, non-cardiovascular mortality, cardiovascular disease mortality, major cardiovascular disease, and stroke. You can read more about that here.

So, what are you waiting for?! I dare you to toast yourself to good health with this tasty Real California Milk snack recipe!

Rye Bread Toast with Real California Milk Fromage Blanc and Cherry Tomatoes

Time: 10 Minutes
Makes: 4 snack servings

[Sponsored]

Ingredients
4 slices sprouted rye bread
5 oz Real California Milk fromage blanc
12 cherry tomatoes, quartered
1 clove garlic, minced
Zest and jucie of ½ lemon
1 tsp thyme, finely chopped
Kosher salt and freshly ground black pepper, to taste
1 tbsp capers

Directions
Toast rye bread and keep warm.

In a small bowl, add fromage blanc, garlic, thyme, lemon juice and zest. Stir to combine and season with kosher salt and freshly ground black pepper.

Spread fromage blanc mixture over toasted rye bread slices and top with cherry tomatoes and capers. Serve immediately.


If you loved this recipe, you will love my recipes for Passion Toast, Mushroom & Brie Stuffed Pastry Wreath, and Beet Rueben Sandwich!

Comment


Print